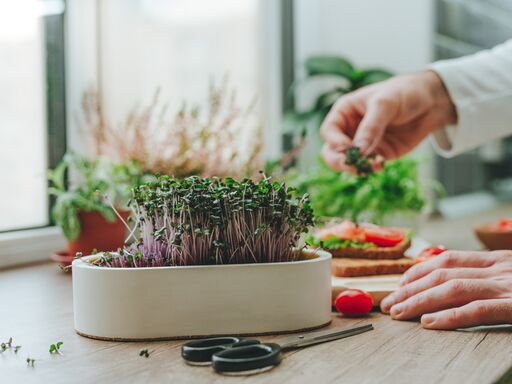
Small plants, big benefits: microgreens for macro health
In recent times, microgreens have taken the culinary and health worlds by storm. These tiny, vibrant greens are not just a pretty garnish for fancy dishes, they are also incredibly nutritious and surprisingly easy to grow at home. Whether you're a health enthusiast, a home cook, or just curious about starting a mini indoor garden, this article will guide you through everything you need to know about microgreens.
What are microgreens?
Microgreens are seedlings of vegetable or herb plants, that are harvested just after the first true leaves develop, usually within 7 to 21 days after germination. They typically grow to a height of 3 to 8 centimeters. Unlike sprouts, which are grown in water and eaten whole (including the roots), microgreens are grown in soil or a soil substitute, and only their stems and leaves are consumed.
Among the most common types of microgreens are broccoli, spinach, arugula, basil, cilantro, beet greens, cress and pea shoots. Each variety has its own unique flavor: from peppery and spicy to sweet and nutty. Furthermore, microgreens can be incorporated into the diet in various ways, such as sandwiches, omelets and salads; blended into pesto or smoothies; or used as toppings for soups, pizzas, and pasta.
Microgreens for macro health
Microgreens are small but nutrient-packed plants that often contain higher levels of vitamins, minerals, and antioxidants than their mature vegetable counterparts. They are rich in natural compounds like polyphenols and glucosinolates, which help reduce inflammation, protect cells from damage, and support the immune system.
The fiber in microgreens supports digestion and promotes a healthy gut, making these tiny greens a powerful and easy way to boost nutrition in your daily diet.
Self-made
Here’s a simple guide on how to grow microgreens at home:
- Choose Your Seeds: Select seeds meant for microgreens, such as broccoli, radish or pea shoots.
- Prepare a Growing Container: Use a shallow tray or container with drainage holes. Fill it with a good-quality potting mix or a seed-starting mix about 3 to 5 centimeters deep.
- Sow the Seeds: Spread the seeds evenly over the soil surface, aiming for a dense but not overcrowded layer. Lightly press the seeds into the soil but don’t bury them deeply.
- Water Gently: Mist the seeds with water to moisten the soil without flooding it. Keep the soil moist throughout the growing period.
- Provide Light: Place the tray in a sunny window or under grow lights for 12-16 hours a day. Microgreens need plenty of light to grow strong and healthy.
- Harvest: Microgreens are usually ready to harvest in 7 to 21 days when they reach about 3 to 8 centimeters tall and have developed their first true leaves. Use scissors to cut them just above the soil line.
- Enjoy: Rinse gently, pat dry, and add fresh microgreens to your meals!
After the harvest it is necessary to sow new seeds, as the plants do not regrow once they have been cut.
Tiny but mighty
Microgreens are great for a healthy, mindful diet: uncomplicated, versatile and full of nutrients. With just a small space and little effort, you can bring these tasty all-rounders directly to your windowsill.
Enjoy planting!
Your Dole Team
